It was only a couple of weeks ago I was saying to some colleagues that now Pure have finished with the whole IPO business, I thought they needed to diversify their portfolio a bit beyond the straight forward AFA.
I am very pleased to say they must have pre-read my mind and that’s exactly what they’ve announced today! 🙂
Not only is their new Pure FlashBlade platform designed to provide pretty much every file type (and object) you might require for your applications and users, it is also Scale Out, which is a key feature I am looking for more and more these days when researching new products for my customers.
Not only is this a really interesting change in direction for Pure, but I see it as a pretty nifty bit of kit in and of itself! You would hope so, as Pure have been working on it in secret for the past two and a half years… 😮
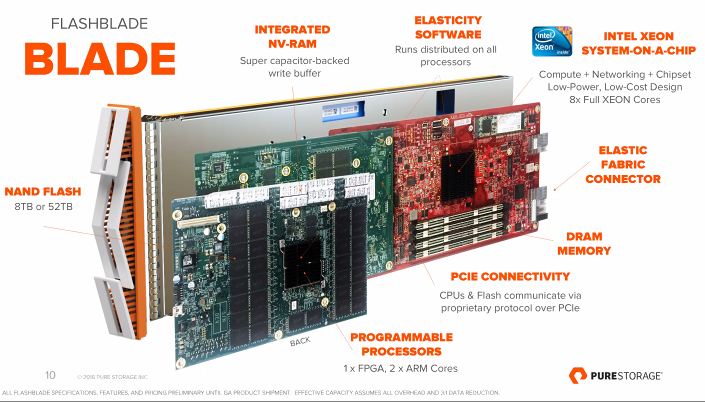
For starters Pure have mixed and matched both Intel and ARM chips on every single blade, with different computational tasks being assigned to different chips, and a bit of FPGA technology thrown in for good measure. The latter being primarily used as a programmable data mover between the different elements of the blade, so as future flash technology becomes available, the FPGA can simply be re-coded instead of requiring total redesign / replacement with every generation. This will enable Pure to change out their flash as often as every 6 months in their production plants, taking maximum advantage of the falling prices in the NAND market.
This chip design was created to use the ARM processors as embedded and linked to the FPGAs, which effectively gives you a software overlay / management function, along with other low intensity, multi-threaded processes. The significant computational power of the Intel chips, particularly for single threaded workloads, rounds out the compute. From a nerdy technologists standpoint, all I can say is schweeeet!
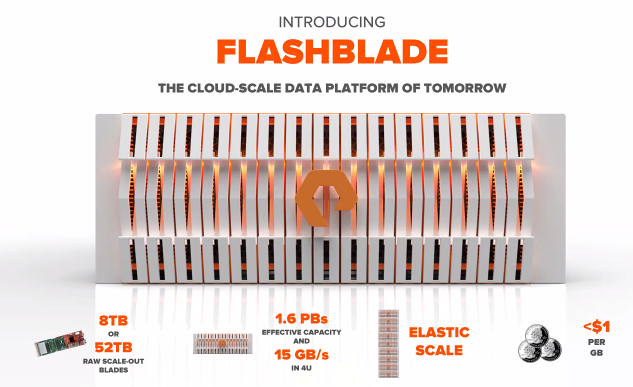
The numbers they are suggesting are pretty impressive too! Each 4u appliance is capable of scaling out linearly with the following stats:
- Up to 15x 8TB or 52TB blades, for a maximum of 1.6PB per 4u chassis
- Up to 15GB/sec throughput per chassis, though I believe this is 4K 100% read, and real numbers might be around 1/3 of this.
- 40Gbps ethernet out, with 2x 10Gbps per blade, connected to a broadcom based, custom, resilient backplane / switch layer within each chassis. Scaling to multiple chassis would require you to provide ToR switch ports for east-west traffic between chassis.
- Overlaying this is Pure’s custom SDN code, which securely separates internal and external traffic, and uses multicast for auto-discovery of new devices.
- Integrated DRAM and NV-RAM on every blade, along with PCIe access to the NAND.
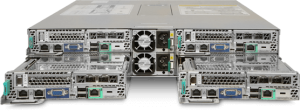
The blades themselves look something like this:
In terms of protocols, it will support NFSv3 out of the box on GA, with SMB and object storage over S3 supported shortly afterward. My understanding is that initial S3 support will be limited to basic commands, PUT, GET, etc, and more advanced feature support is in the pipeline. The initial release seems to be primarily targetted at the filer market, with object being the underlying architecture, but not the main event. As this support is built out later, the object offering could become more compelling.
The data itself is distributed and protected through the use of N+2 erasure coding, using however many blades are in the chassis. For example an 8 blade system would be configured as EC 6+2. As the number of blades in the system increases, garbage collection cycles are used to redistribute data to the new capacity, though I am still not 100% sure how this will work when your existing blades are almost full. The compute within each blade, however, acts independently of the storage and can access data resources across the chassis, so from the moment the additional blade is added, you have immediate access to the compute capacity for data processing.
My only query on this would be why Pure did not offer the ability to choose between Erasure Coding, which is ideal for lower performance requirements, and replicas, which would be handier for very low latency use cases? If you are putting it all on flash in the first place, instead of a hybrid model, there may be times when you want to keep that latency as low as possible.
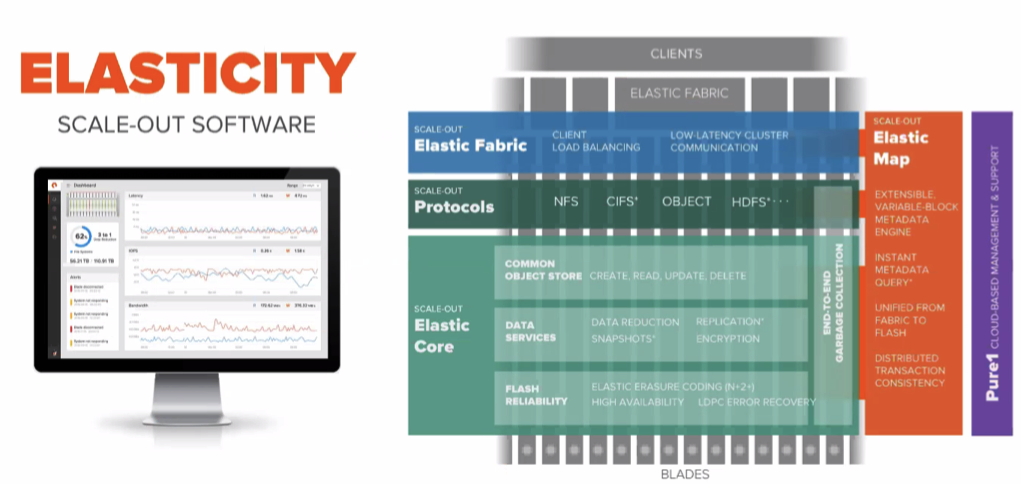
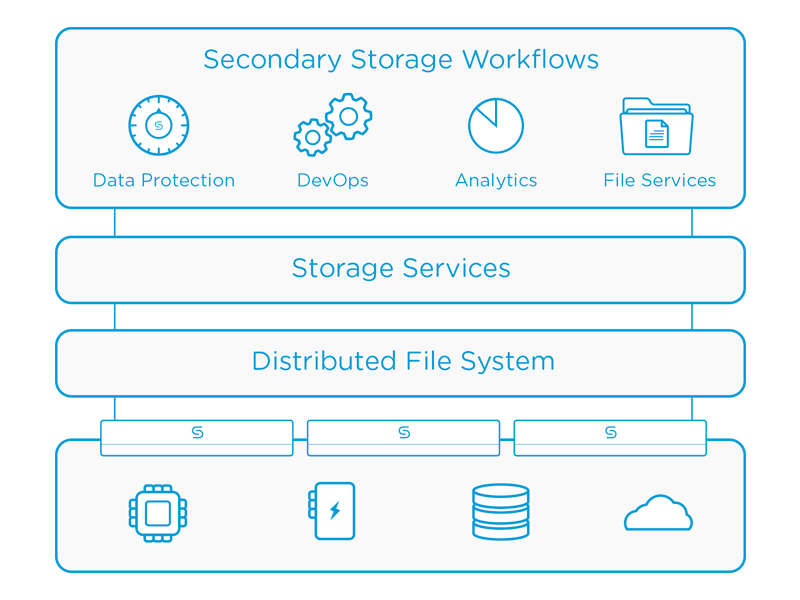
The software platform they have design to manage this is called Elasticity, and to reduce the need to learn yet another interface, it looks very similar to the existing Pure management interfaces:
A metadata engine with search functionality will be coming later, which will allow you to gain insights into the types of data you hold, and may potentially able to delve into the content of that data to find things such as social security numbers, etc. There are few details available on this at the time of writing.
As with the other Pure platforms, telemetry data is sent back to base on a regular basis, and Pure take care of all of the proactive maintenance and alerting for you. All of this data is presented through their Pure1 portal, which is pretty fully featured and intuitive.
I have to say I am genuinely surprised to see Pure come out with a solution with such completely bespoke hardware, when the entire industry is going in the direction of commodity + software, but the end result looks really promising. The sooner they can get SMB (not CIFS!) into the product the better, as this will allow them to begin competing properly with the likes of NetApp on the filer front.
As with many new products we tend to see on the market, the data services are not all there yet, but at the rate Pure do code releases, I don’t imagine it will be long before many of those RFP check boxes will be getting checked!
GA is expected during the second half of 2016.
Disclaimer/Disclosure: My accommodation, meals and event entry to Pure Accelerate were provided by Pure Storage, and my flights were provided by Tech Field Day, but there was no expectation or request for me to write about any of the products or services and I was not compensated in any way for my time at the event.


 RSS – Posts